Install Guide
Installing Your Jeep Interior Trim Kit
Last updated: October 27, 2026
These kits are adhesive covers over your factory trim, not replacement pieces. Your original trim stays installed.
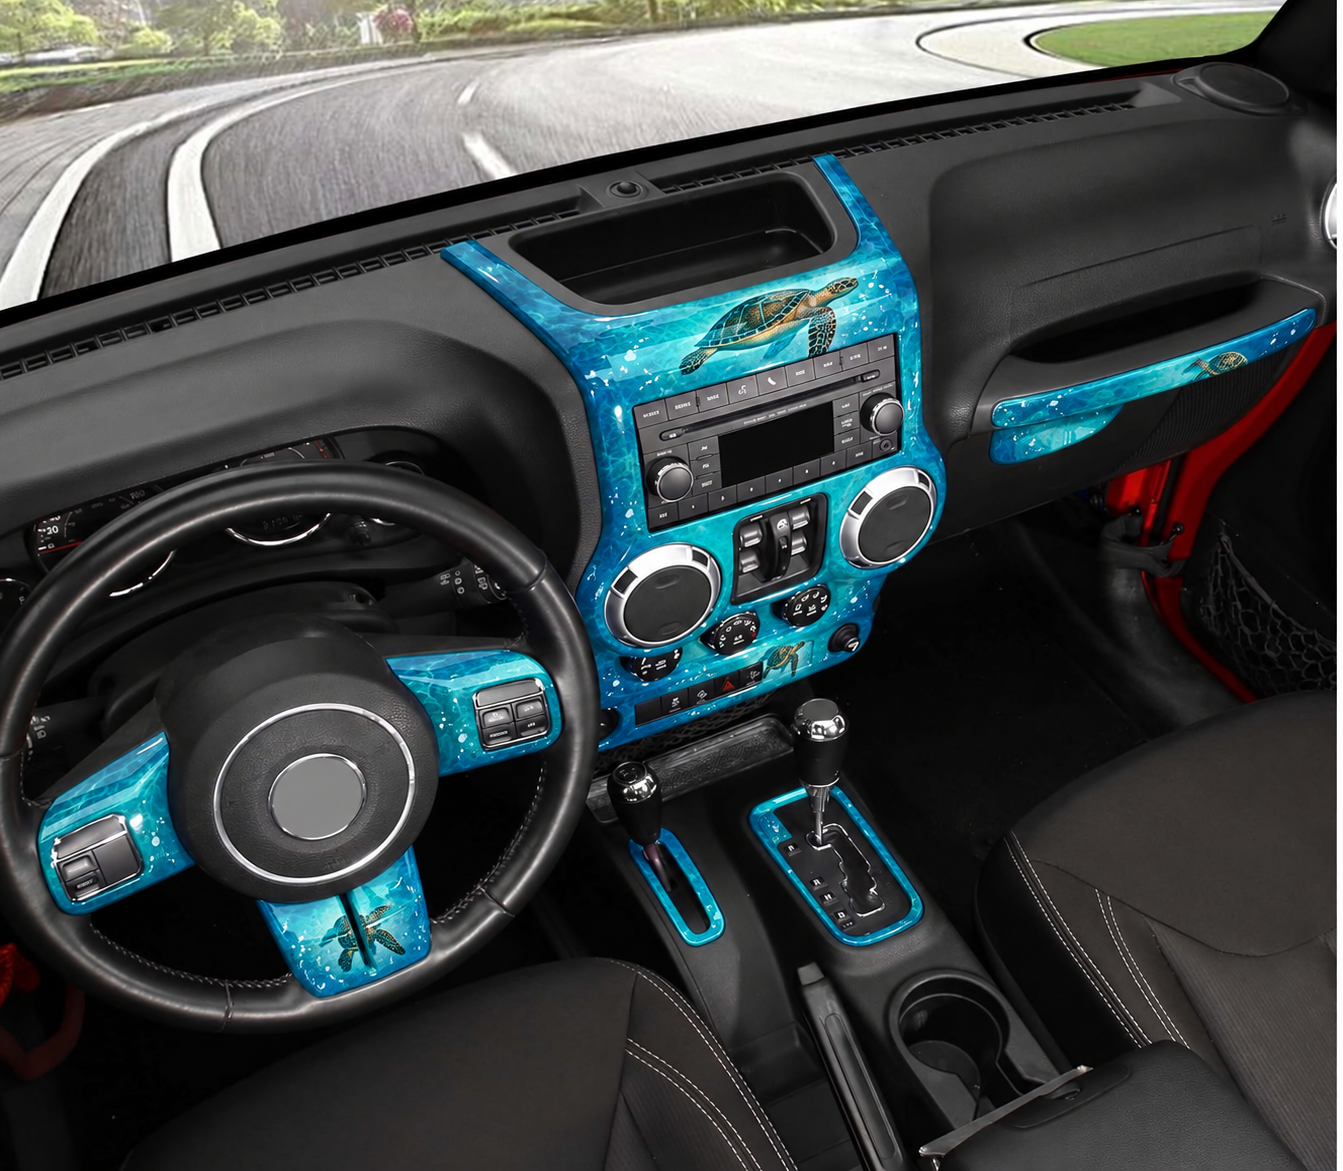
Confirm fitment before applying adhesive
Check that your kit matches your exact Jeep year, model and dash generation. Dry-fit each cover over the corresponding factory trim to confirm its orientation and alignment before applying adhesive.
Prepare the surfaces
Clean and dry the factory surfaces as directed by the adhesive instructions supplied with your kit. Follow those instructions for surface preparation rather than guessing at cleaners or application conditions.
Align and apply each cover
Leave the factory trim in place. Carefully align each painted cover, then apply it over the original trim following the included kit and adhesive instructions. Follow the supplied guidance for any setting or curing requirements.
Need help with fit?
If a cover does not line up during the dry fit, stop before attaching it. Contact Melinda with your Jeep year, model and photos so we can help confirm fitment.
Other models: 2011–2017 Wrangler JK · 2018–2023 JL/JT · 2024+ JL/JT · Wrangler JL (all years) · Gladiator JT (all years)